
Audio In, Out, and All About in Camelot 2.1
Perhaps the most exciting improvement in Camelot 2.1 is the addition of new capabilities for getting audio into Camelot and moving it around within a Scene. Layers, hardware device items, and sidechain or aux inputs for items can all now accept external audio through their Audio & MIDI Settings. Let’s take a closer look.
Layer Audio Input
Each Layer can now be fed with a selected audio input. This means you can bring vocals into Camelot, process them through your best compressor and delay or reverb plugins, then mix the result with all of your software and hardware instruments. You can even create effects loops that send audio from Camelot to an external processor and bring the processor returns back into layer audio inputs. The fact is, Camelot now can be the mixer for your entire rig.
Using a Layer audio input takes only three steps: first, be sure that your microphone or external processor is connected to inputs on your audio interface.
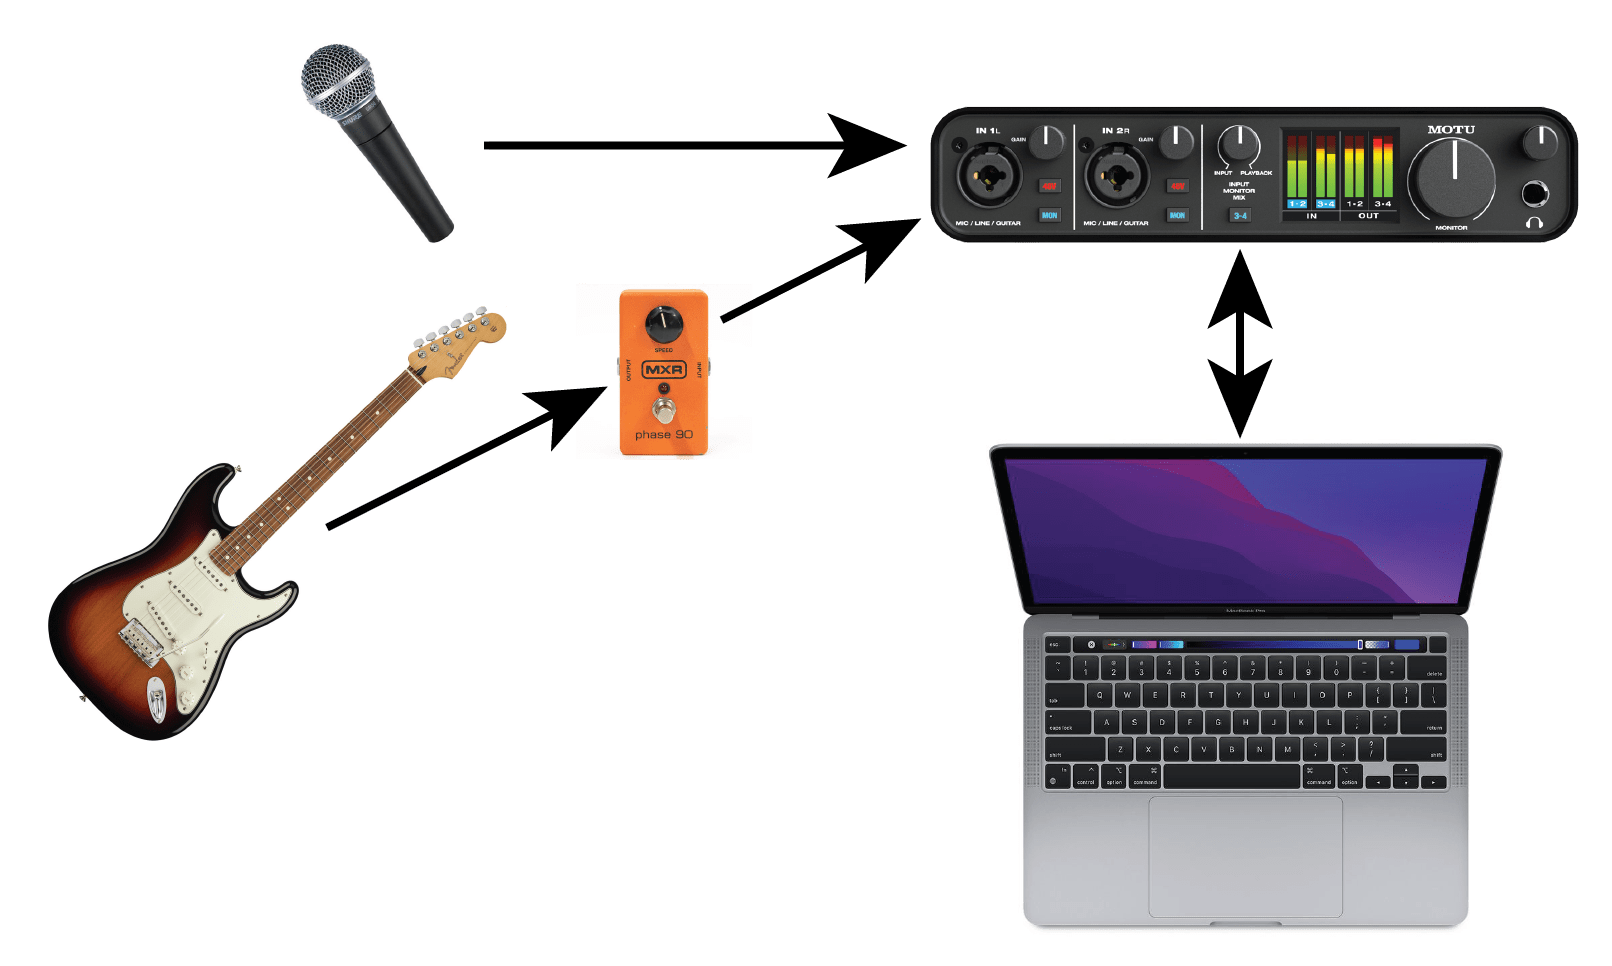 Figure 1 – Connect mics and instruments to interface
Second, go to the Audio>Audio Input pane of the System Settings view. Click the plus sign at the bottom of the Audio Inputs pane to add additional Camelot audio inputs, if you need them. Click on the name of one of the Camelot audio inputs shown there, and choose your interface’s audio inputs from the list that is displayed.
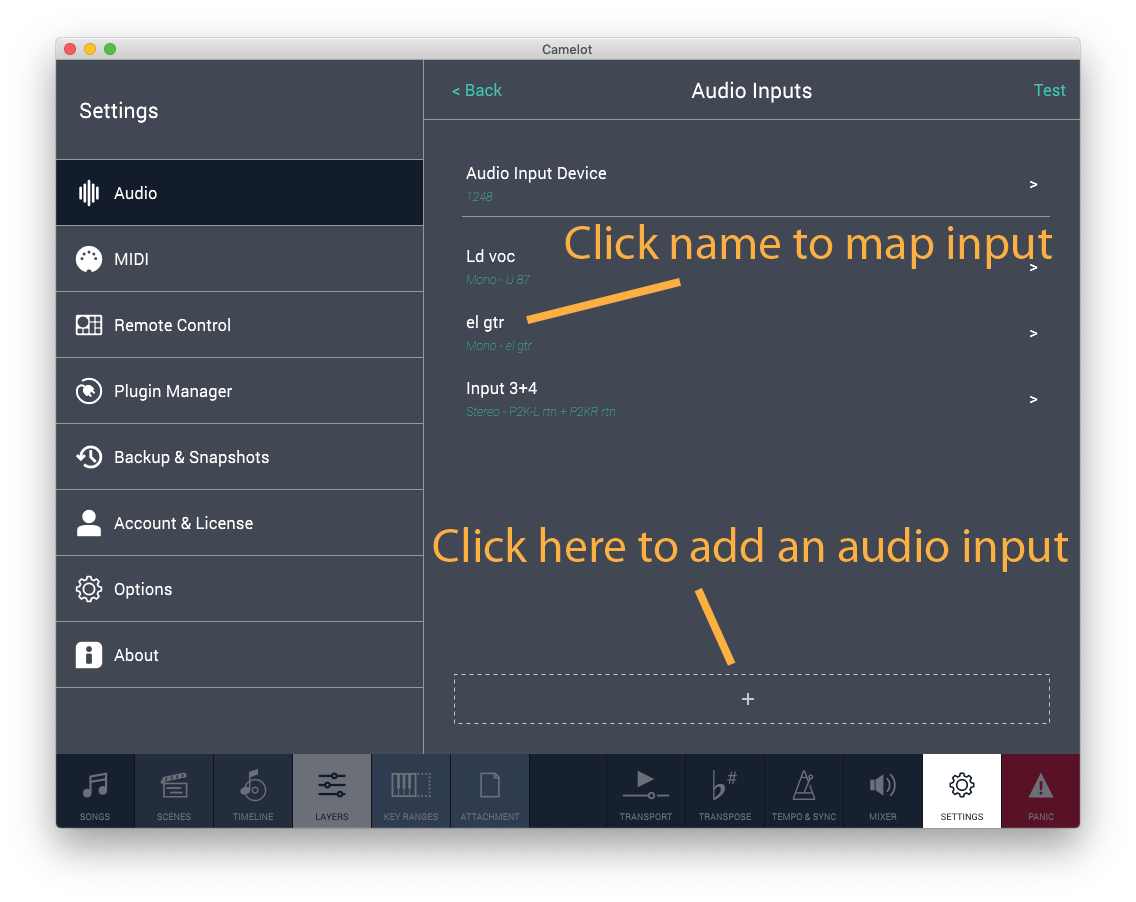 Figure 2 – System Settings>Audio Inputs
Click on the name of a Camelot audio input to edit its mapping to your interface. Note the toggle field in the upper right that lets you make any input be mono or stereo. It is possible to change from one to the other after an input has been assigned, but, obviously, doing that necessarily changes the assignment, so be careful.
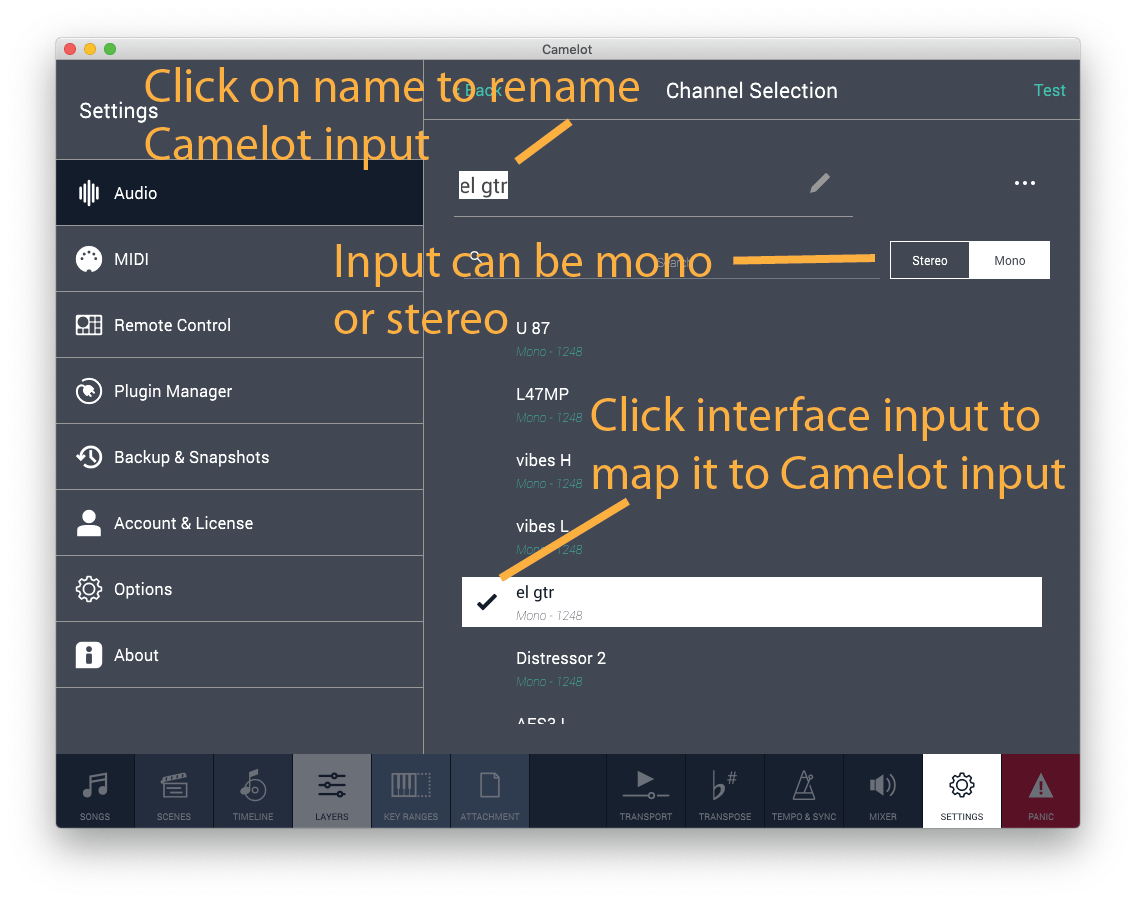 Figure 3 – Map interface inputs to Camelot inputs
If you want to delete an audio input, click the “three dots” icon in the upper right and select Delete from the menu that drops down.
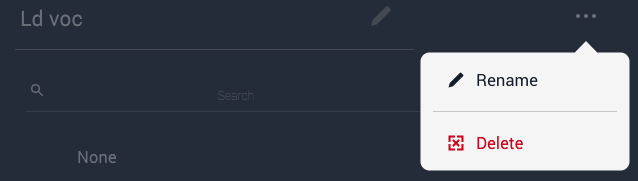 Figure 4 – Delete input
Finally, open the Audio and MIDI Settings>Audio Input pane on the layer and click the name of the Camelot audio input you want to feed that layer. When the Settings view opens, the whole panel will be displaying MIDI Settings. Just click the arrow in the upper right corner to collapse those and you will see the Audio settings and be able to click the Audio Input pane.
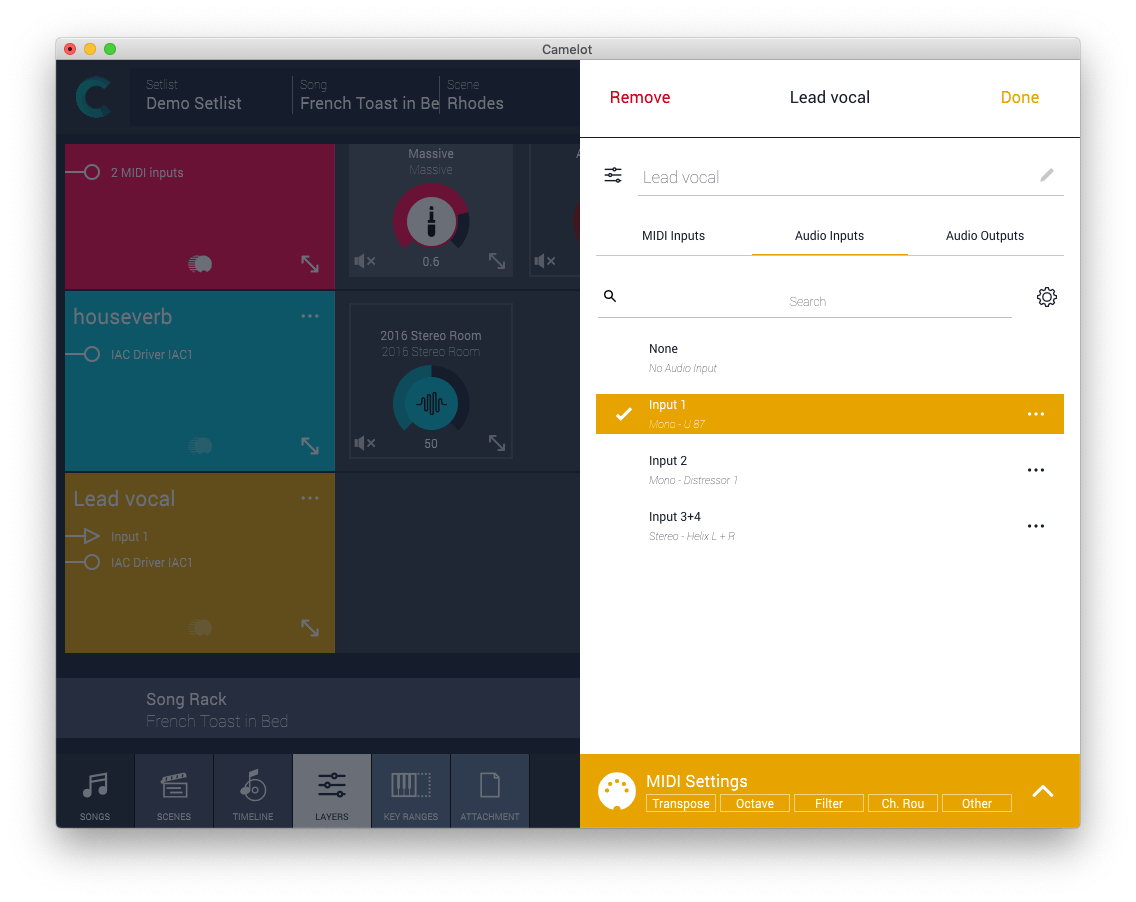 Figure 5 – Map audio input to layer
Click Done in the upper right corner, and your external audio is now flowing into that layer and any processors in the layer. When you look at the layer, you’ll see a triangle icon on the left side with the name of the Camelot audio input mapped to that layer.
 Figure 6 – Layer audio input indicator
The layer volume fader in the Mixer view lets you balance your external input with everything else. The meter next to the fader shows you the level in the layer, but you might want to check meters in any plugins you’re using to monitor levels through the signal chain.
MIDI Device Item Audio Input
Up until now, you could control a hardware MIDI synthesizer or other device from Camelot, but you had to mix its audio externally. Now, Camelot’s Hardware Devices items (whether Smart Maps or custom maps) can accept audio inputs, so Camelot can both control an external synth and mix its audio.
Setting up an audio input for an external device is pretty much the same process as for a Layer audio input, except that you want to access the Hardware Device item’s Audio & MIDI Settings, instead of the layer’s settings. Click on the name of the item and its settings will show up. If preset selection is being displayed, click the arrow where it says Audio & MIDI Settings at the bottom to collapse the preset display and show the audio settings. Click Audio Inputs and select the input(s) you want to use.
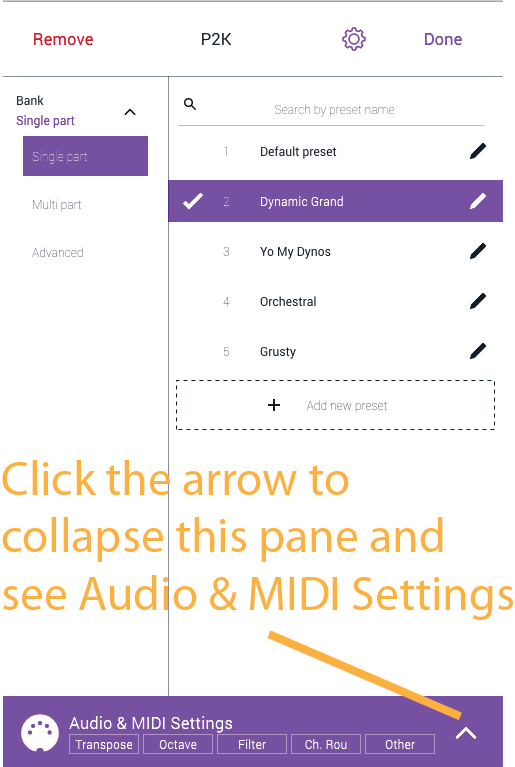
Figure 7 – Showing Audio & MIDI Settings
Beneath the Audio Input setting is the Item Main Knob and Pan setting. When this is set to MIDI, the big knob that appears on an Item on a Layer will send out MIDI CC 11 messages by default, and the associated Pan control sends out CC 10 (which is the CC dedicated to Pan). But the main knob can be changed to send out any MIDI CC number you wish by expanding the Item and clicking on the CC11 legend at the top of the fader.
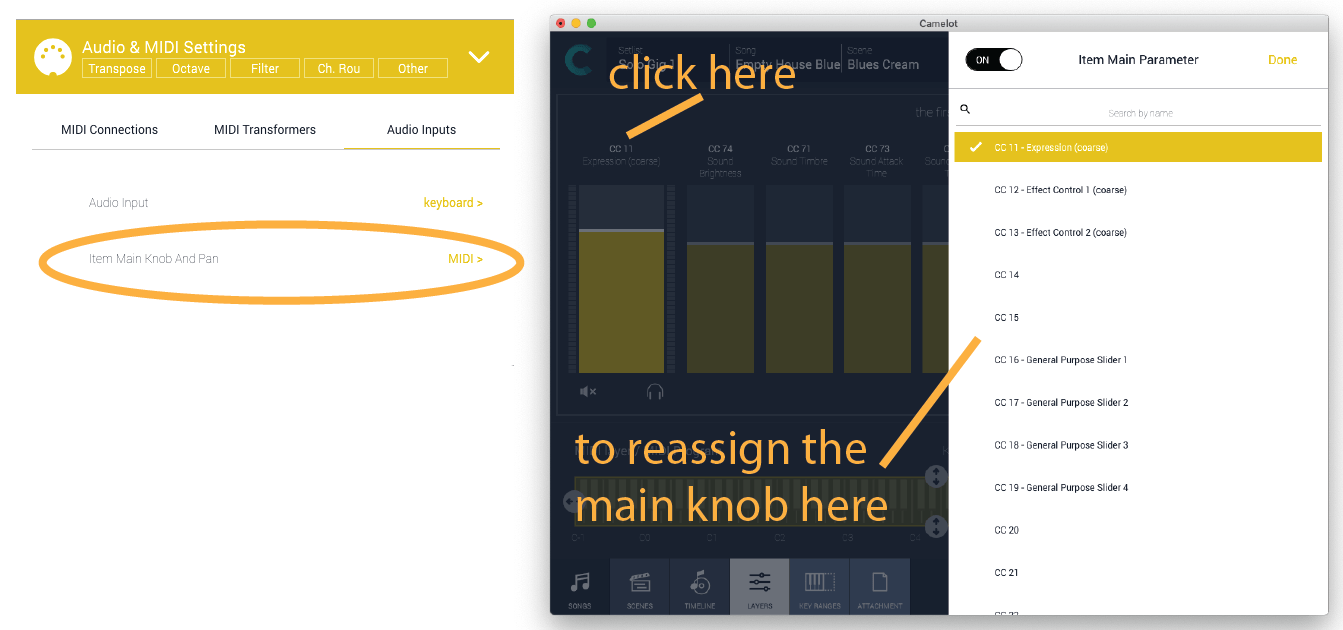
Figure 8 – The Item Main Knob and Pan setting (shown on the left) lets you assign an Item’s main knob and pan control to either be sent as MIDI messages or controlled in Camelot’s audio engine. If MIDI is chosen, the main knob can be assigned to send any MIDI CC number, as shown on the right.
You can mix several external devices in a single layer by selecting audio inputs for each item, and then mix in a microphone as a layer audio input. With the ability to accept audio inputs to items and layers, you can get quite sophisticated with mixing in Camelot. Your biggest limitation is likely to be the number of audio inputs on your interface.
Plugin Sidechain Inputs
Some plugins have the ability to accept auxiliary audio inputs. That could mean inputs to a vocoder or ring modulator, or a sidechain input for a compressor. Sidechain inputs are accessed exactly as they are for external devices: click the item name to bring up Audio & MIDI Settings and then go to the Audio Input pane, where you will see two settings. SideChain Bus displays the inputs available in the plugin, while SideChain Input allows you to select the Camelot audio input that will feed the plugin input selected in the SideChain Bus setting.
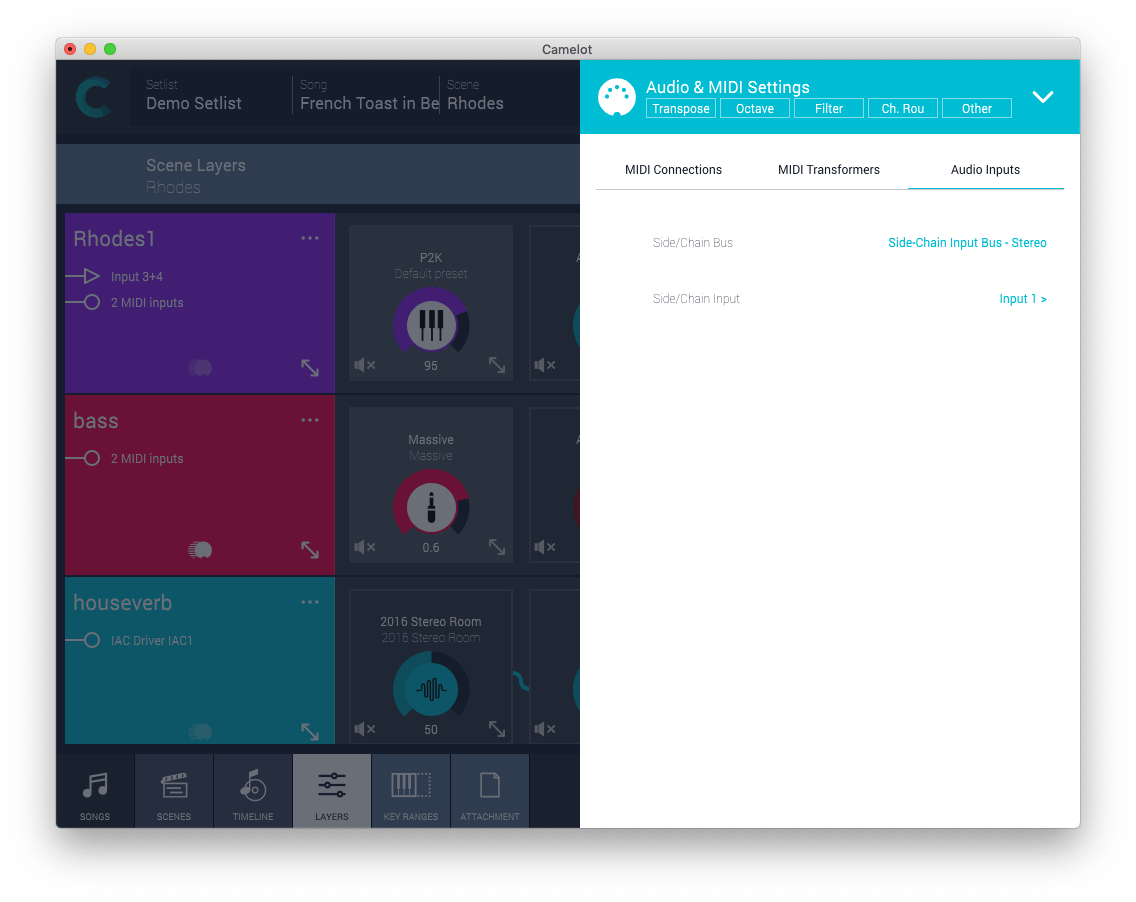 Figure 9 – Sidechain inputs
Routing audio between layers
In addition to accepting external audio, Camelot 2.1 also adds the ability to route audio between layers. Simply insert an Audio Layer Connector item in the source layer, choose the destination layer, and set the level to be sent to the destination. This feature makes it easy to set up a layer as a dedicated processing chain and then send audio from other layers to it, with a separate send level for each layer. In addition, the send can be placed anywhere in the source layer, so it can be tapped from any point in the layer’s signal path.
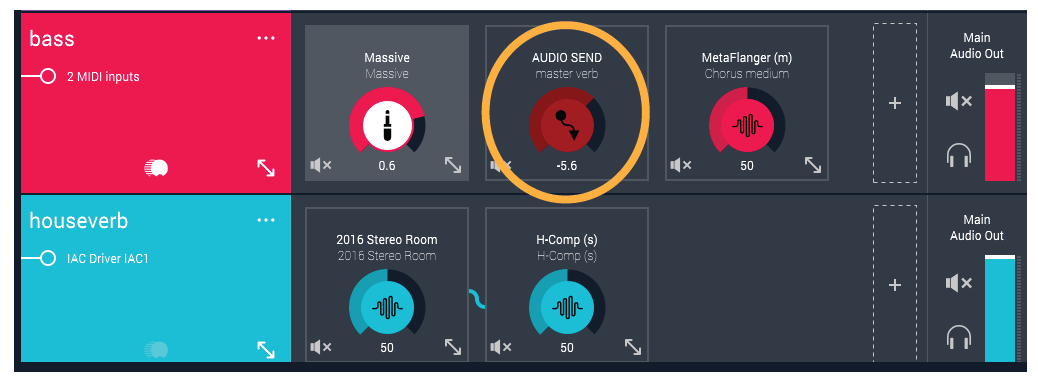 Figure 10 – Layer Audio Send
To insert an audio layer connector, add a new item, choose Post-Processors> Audio Layer Connector, click Audio Send, and select the destination layer from the list that’s shown.
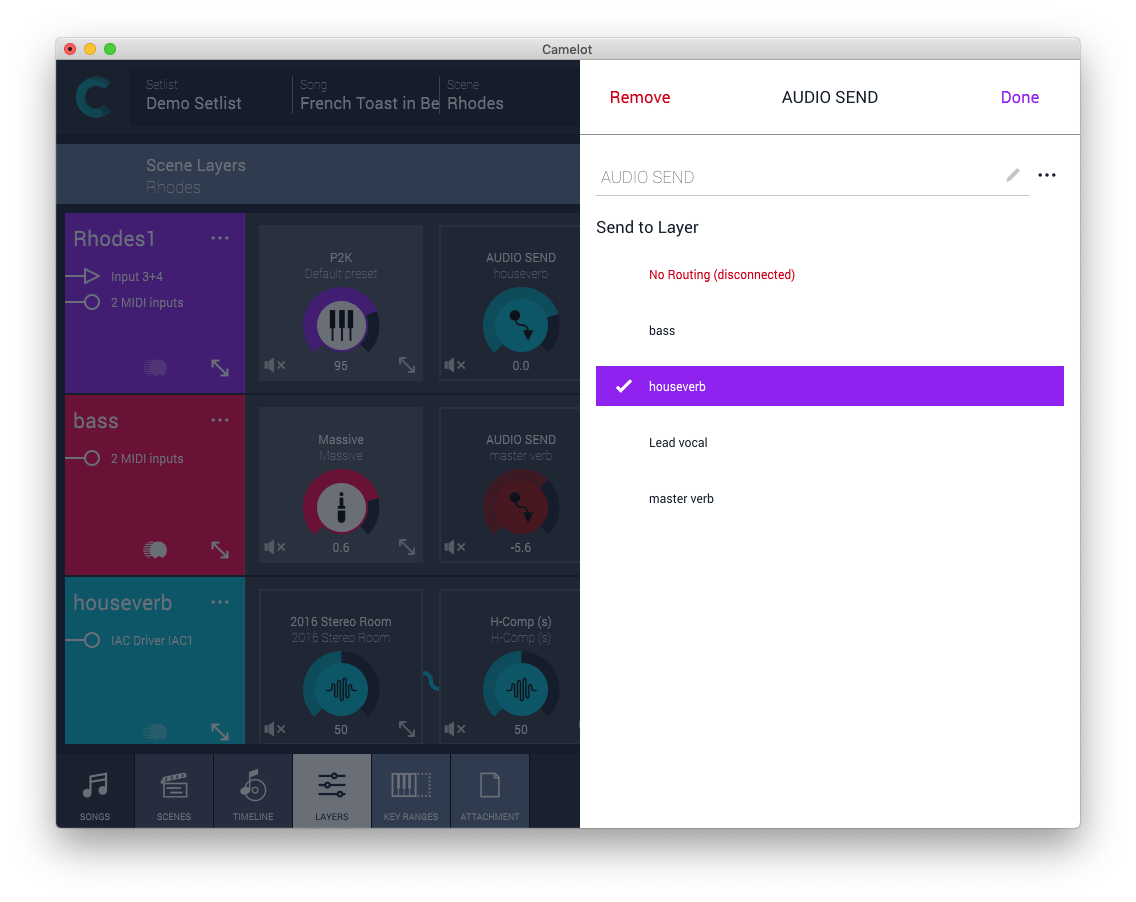 Figure 11 – Choosing layer Audio Send destination
Glitchless switching
One of Camelot’s most important capabilities is being able to switch scenes, which lets you completely redefine the sonic world in an instant. That’s so easy that it hides how difficult it is to actually make such a big switch seamlessly. Camelot allows no glitching or interruption in the audio when scenes are changed, and MIDI changes are handled appropriately to avoid problems, as well.
This means, for example, that harmony vocal microphones can be enabled for song choruses, with compression, reverb, or any other processing, then muted for the quiet verses where there is only lead vocal.
 Figure 12 – Full band mix